
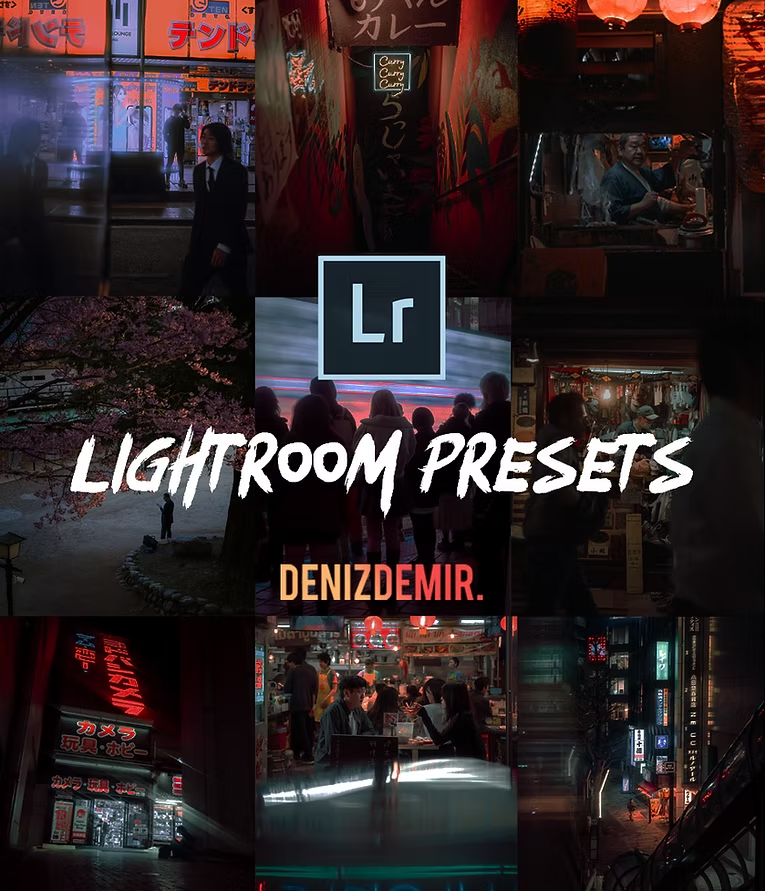
Lightroomプリセット
写真編集は、私にとって撮影とは切り離された作業ではなく、写真表現の延長線上にあるものです。このコレクションに収録されているすべてのプリセットは、街のストリートフォト、ポートレート、商業撮影、そして個人的な作品づくりを何年も続ける中で生まれました。流行を追いかけるためではなく、自分らしい一貫した写真表現を作り上げるために作ったものです。
ネオンの色彩を表現した Nihon Nights から、時代に左右されない色づくりを目指した Nihon Classics まで、それぞれのコレクションには、私自身の写真家としての歩みと、カメラを通して世界をどのように見ているかが反映されています。これらは、私が普段の編集ワークフローや、このウェブサイトに掲載している作品でも実際に使用しているプリセットです。
これらのプリセットは、あなたの作品づくりに力強いスタート地点を提供しながらも、最終的にはあなた自身の表現へと仕上げられるだけの自由度を残すよう設計されています。

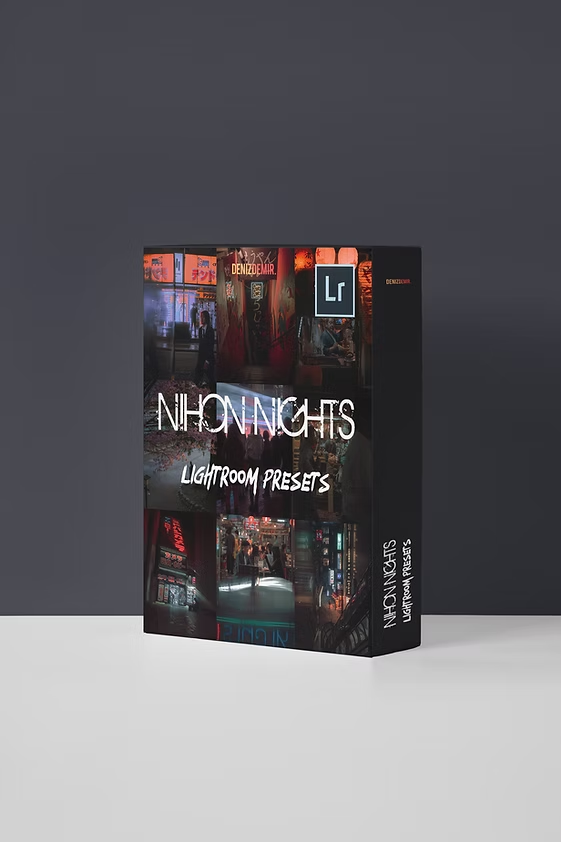
NIHON NIGHTS
新登場|18種類のプリセット+ボーナス2種類を収録
Nihon Nights は、私が長年使い続けてきたストリートフォトグラフィー用プリセットを全面的に見直し、新たに仕上げた18種類のプリセットコレクションです。映画のようなシネマティックな世界観を表現できるよう、一つひとつ丁寧に制作しました。主に夜のストリートフォトや都市風景の撮影で使用していますが、ホワイトバランスを少し調整するだけで日中の写真にも活用できます。編集時間を大幅に短縮してくれる、私のワークフローには欠かせないプリセットです。そして今回、そのすべてを皆さんにもお届けします。
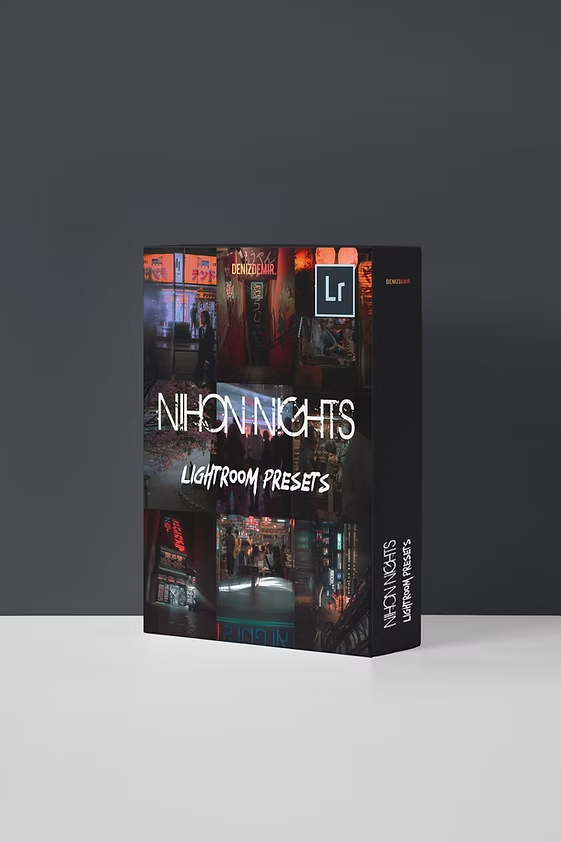
東京を代表する鉄道駅へのオマージュ
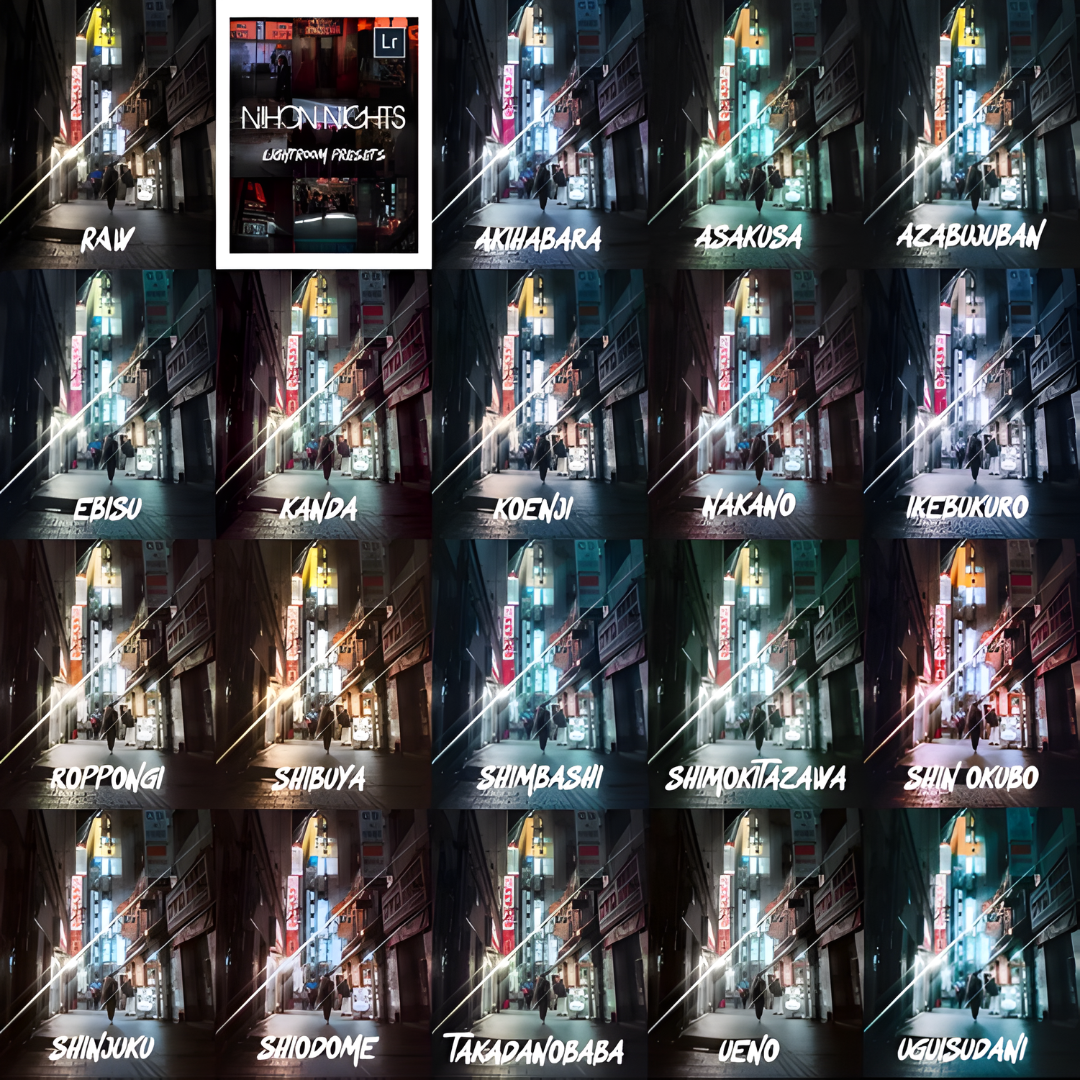
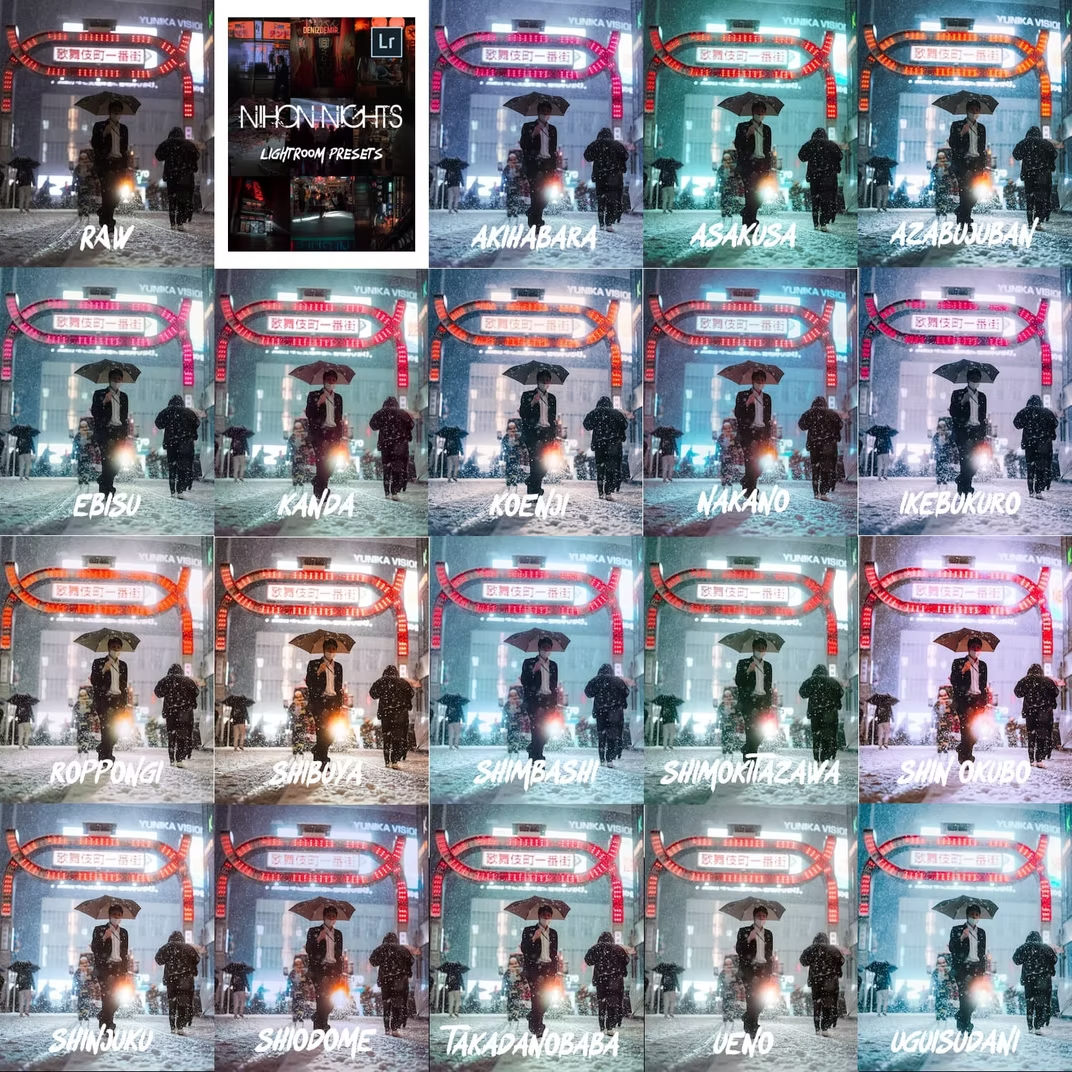
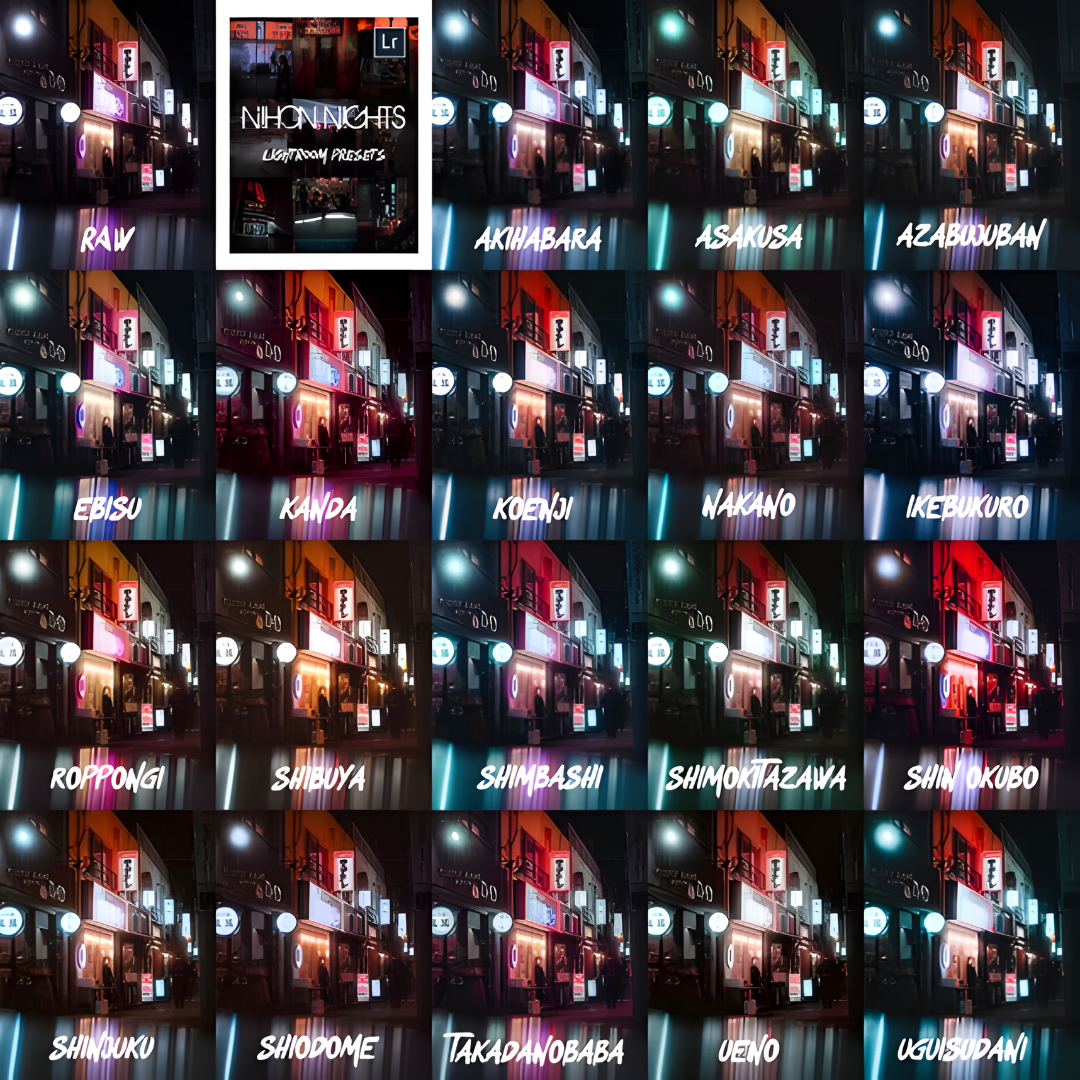
18種類のプリセット
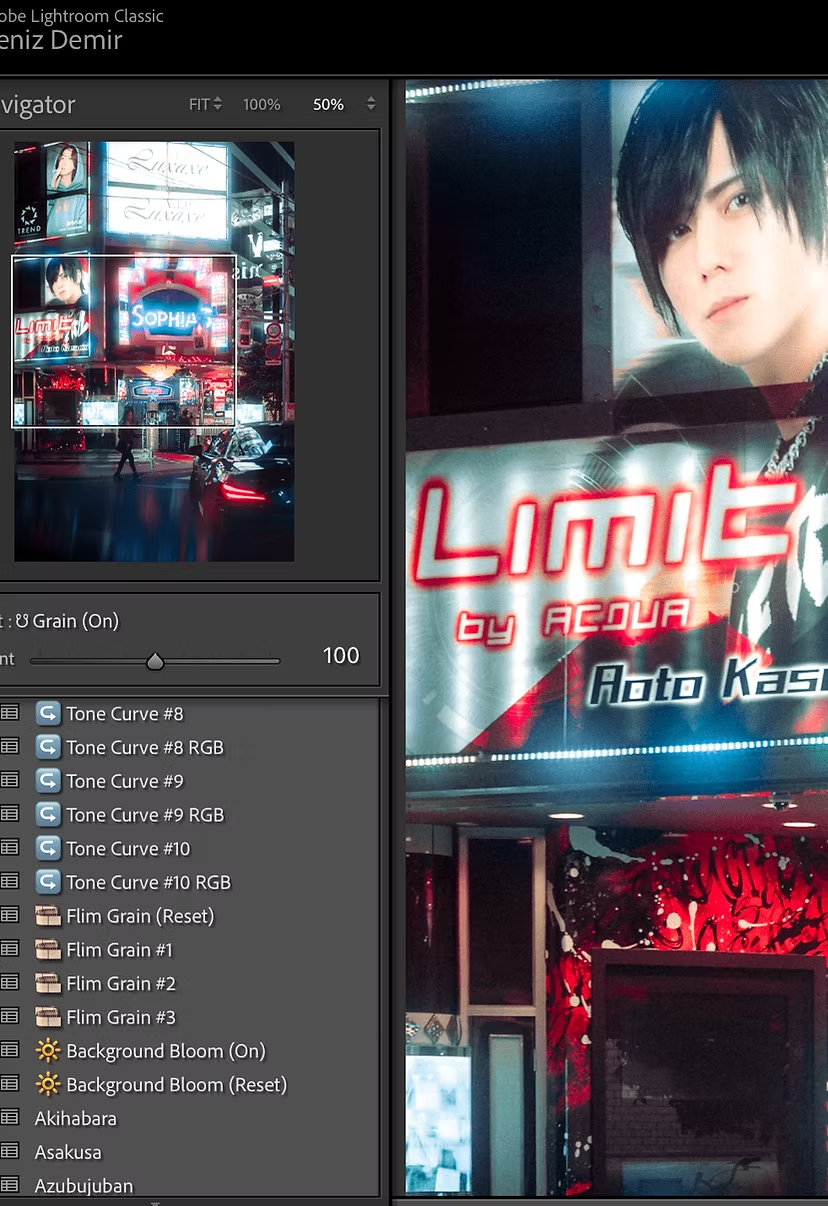
20種類のトーンカーブ
Bloom ON / OFF
3種類のフィルムグレイン ON / OFF
お好みに合わせてプリセットをカスタマイズできるよう、さまざまなオプションをご用意しています。
20種類のトーンカーブ(RGB調整あり・なし)
Bloom ON / OFF により、ハレーション効果を加え、ハイライトをより印象的に演出
3種類のフィルムグレイン ON / OFF により、写真によりラフでフィルムライクな質感を加えることができます
NIHON CLASSICS
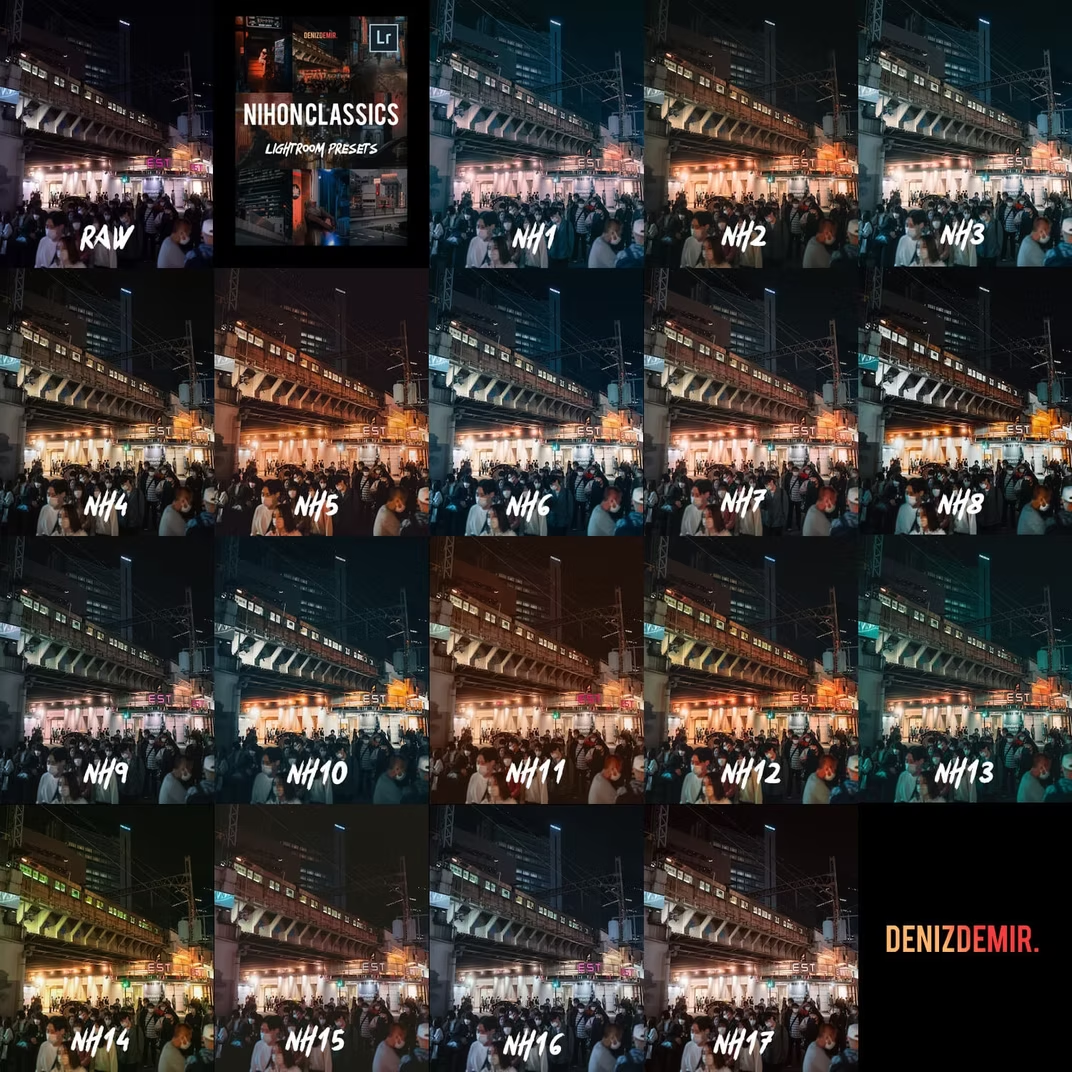
オリジナル・ストリートプリセットコレクション
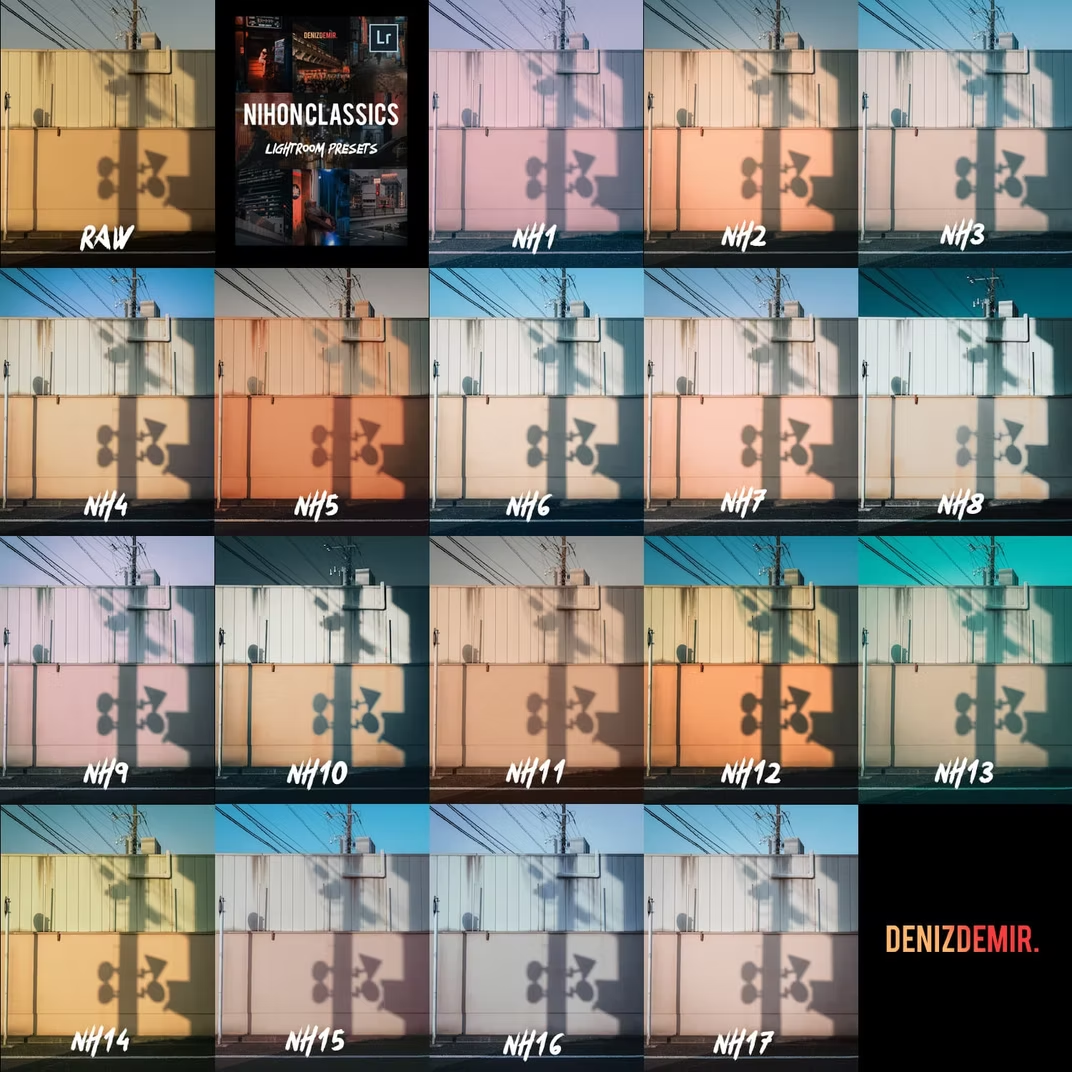
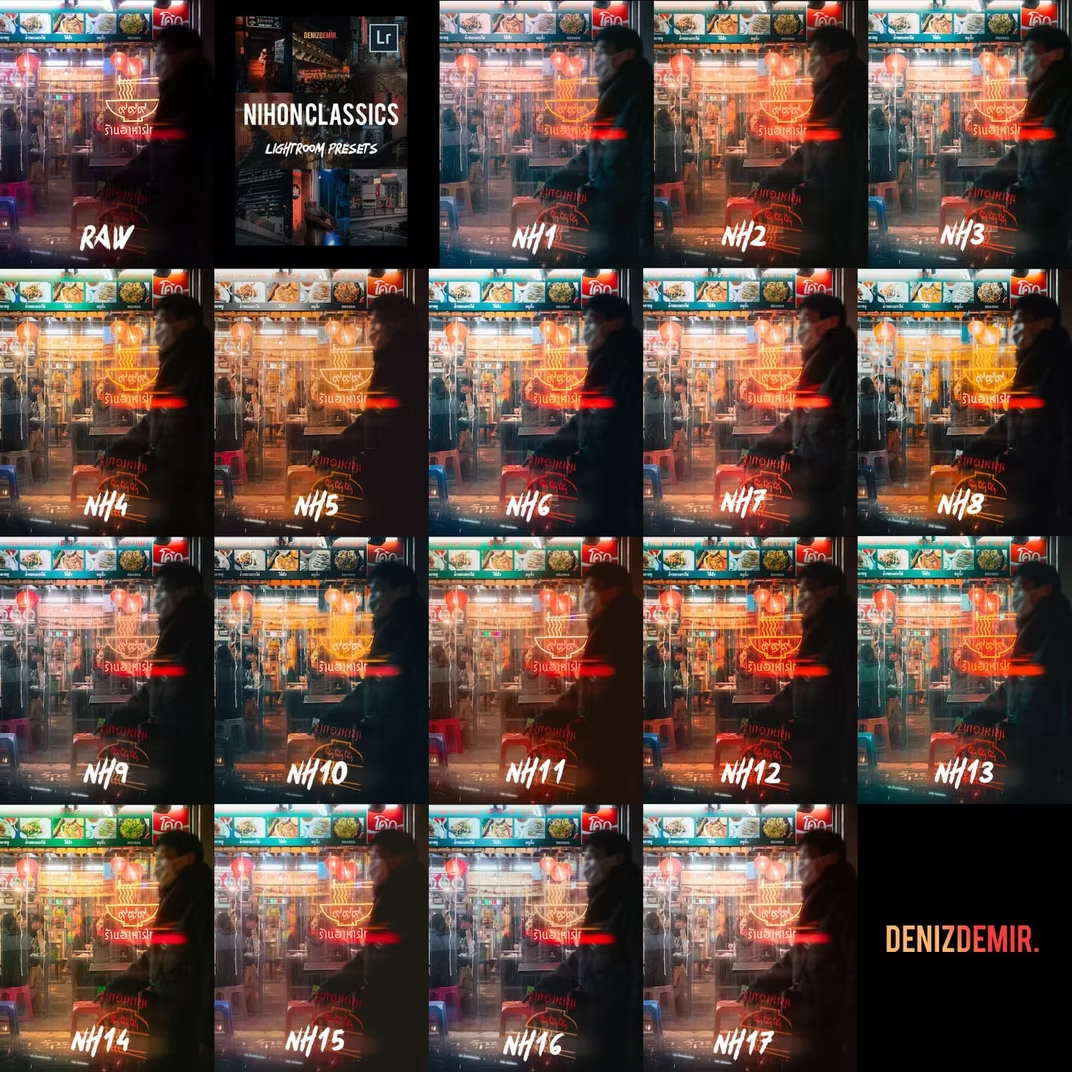
Nihon Classics は、私が最初に制作したお気に入りのストリートプリセット17種類を収録したコレクションです。一つひとつ丁寧に仕上げ、私らしいシグネチャースタイルを表現できるよう制作しました。昼夜を問わずストリートフォトや都市風景の撮影で日常的に使用しており、編集時間を大幅に短縮してくれる、私のワークフローには欠かせないプリセットです。
ぜひ下のサンプルで、その仕上がりをご覧ください。
Film Grain ON / OFF も収録。
BEFORE / AFTER
使い方
Notes about using Presets
01
基本補正
プリセットはあくまでも編集のスタート地点です。元の写真の色やライティングによって、合うプリセットもあれば合わないものもあります。ぜひご自身の好みに合わせて自由に調整してみてください。
ホワイトバランス
露出
ハイライト・シャドウ・白レベル・黒レベル
自然な彩度・彩度
カラーミキサー
カラーグレーディング
キャリブレーション
02
トーンカーブ
トーンカーブは Lightroom の中でも最も強力な編集機能のひとつです。そのため、このパックには20種類のトーンカーブを収録し、さまざまな編集表現を楽しめるようにしました。
このプリセットでは、通常のトーンカーブだけでなく、RGBそれぞれのトーンカーブも活用しており、それぞれのプリセットに独自の表現を与えています。
メインのポイントカーブは10種類用意し、それぞれRGB調整あり・なしのバリエーションがあります。お気に入りのプリセットを選んだあとも、これらのカーブを組み合わせてさらに自分好みの仕上がりへ調整できます。
03
フィルムグレイン
リセット用プリセットを含め、3種類のフィルムグレインを収録しています。
Film Grain #1:細かい粒子
Film Grain #2:中程度の粒子
Film Grain #3:中程度の粒子(サイズ・量を強調)
04
Bloom
Bloom ON / OFF プリセットでは、ハレーションのような効果を加え、ハイライトを柔らかく印象的に演出できます。
初期設定は100になっていますので、強すぎると感じる場合は MASKS セクションのスライダーでお好みに合わせて調整してください。
写真によって効果が十分に現れない場合は、ラジアルグラデーションやリニアグラデーションを追加すると、より自然な仕上がりになります。
Lightroomへのプリセットのインストール方法
ご使用の Lightroom のバージョンを選択して、インストール方法をご確認ください。
LIGHTROOM CLASSIC 7.3
LIGHTROOM 4,5,6 or olde
LIGHTROOM (CC) DESKTOP CLOUD-BASED VERSION
それでも問題が解決しない場合は、お気軽に hi@denizdemir.photos または Instagram(@denizdemir.photos) までご連絡ください。
LIGHTROOM CLASSIC 7.3+
Step 1: Download your Lightroom Presets. The presets will come in a .zip file.
Step 2: Navigate to the Develop Module in Lightroom and click on File>Import Develop Profiles and Presets (see image below).
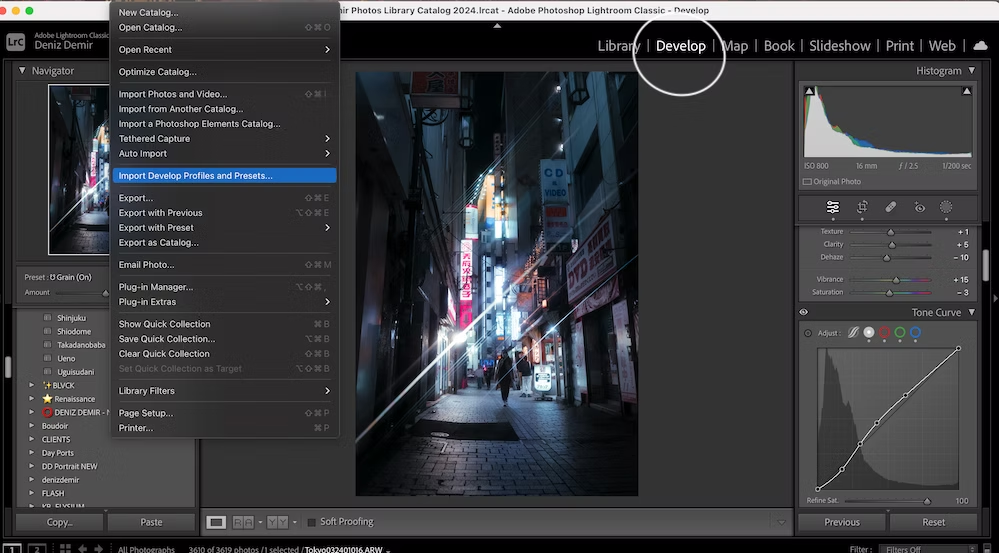
Step 3: Locate the downloaded zipped preset file or the folder with unzipped XMP files.
Step 4: Open Presets Panel, expand presets folder, and click a preset to apply it.
DOESN'T WORK? TRY ANOTHER METHOD
Launch Lightroom Classic, click the small "+" on the Presets Panel, and select "Import Presets." Locate the downloaded zipped preset file, and the presets will install automatically!
Ensure you are in the Develop mode to view the Presets tab.
LIGHTROOM CLASSIC 4,5,6 (.LRTEMPLATE Files)?
Step 1: Download your presets for Lightroom. The presets will arrive in a zip file, so you will need to unzip them and extract the files.
Step 2: On a Mac, open Preferences in Lightroom. On Windows, open Edit then Preferences.
Step 3: Choose the Presets tab within the Preferences dialog box, and then:
For older versions of Lightroom, click on "Show Lightroom Presets Folder."
If you're using a more recent version of Lightroom Classic, click on the "Show All Other Lightroom Presets" box.
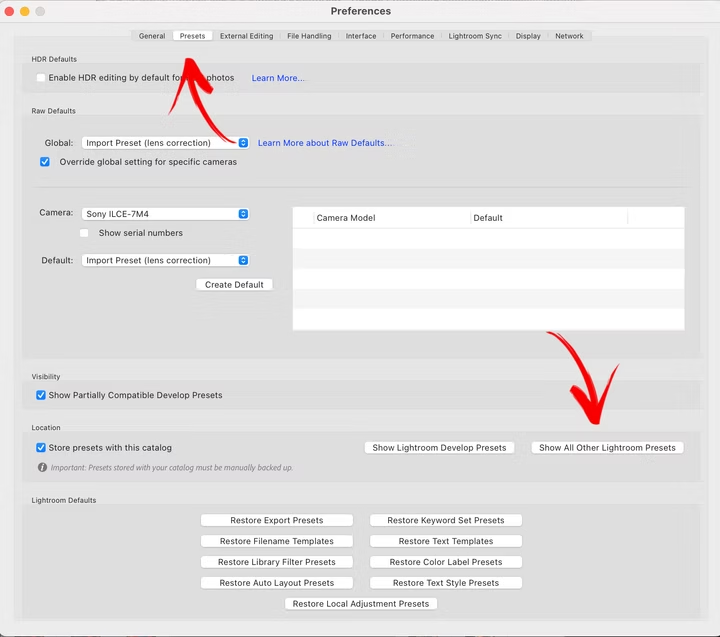
Step 4: For an OLD Version of Lightroom - Click on Lightroom Folder and then, Open the "Develop Presets" folder.
For a NEW Version of Lightroom - Just Click on the Settings Folder.
Step 5: Copy the unzipped folder located in your downloads and paste it into the "Develop Presets" folder.
Step 6: For the final step, restart Lightroom, and you'll discover your presets in the Develop Module, listed under the Presets section.
LIGHTROOM CC CLOUD BASED VERSION
1. Download Lightroom Presets (.zip file) from the link sent to you after purchase
2. Open Lightroom CC and select an image
3. Choose File > Import Profiles and Presets.
4. Locate the zipped preset file or unzipped XMP files folder.
5. Done! Open Presets Panel, expand the folder, and click a preset to apply.
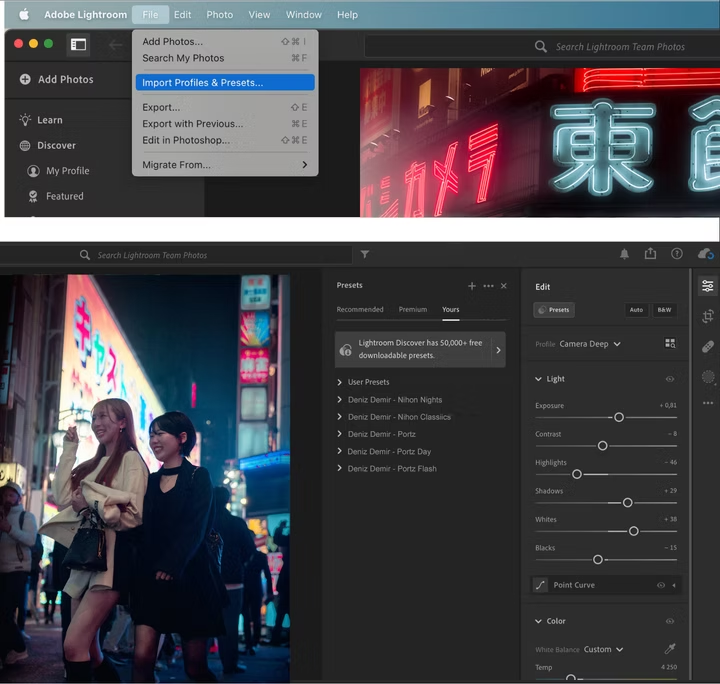
ANOTHER METHOD
Select your image and choose the edit option (or press 'E' on your keyboard).
Click on "Presets." Click on the ellipsis (...) and choose "Import Presets."
Import your presets, and you're good to go!